Tuesday, December 30, 2008

Free Template: New Pinky Girl Template

I created another new template for my Blogger's Template Series and I called it New Pinky Girl Template. This template is mainly pink in color. I want to use pink color because I know that a lot of girls like pink color very much. So, this template is pink in color.

So, if you are interested to get "New Pinky Girl Template", please proceed to the later part of this post. You can download it and install it to your blog.

This template is a simple template. I do not make it into a 3 columns template because I want to make it very simple and clean. So, it is a simple 2 columns template.


The Red Template Specifications:
  • 2 Columns
  • Dark Red, Pinkish Red, Grey and white
  • XML template
  • Free for All.
Download New Pinky Girl Template Here...

If you encounter any problem installing or downloading the template, please do not hesitate to inform me. I hope that this new template will be a nice template for all.

Saturday, December 27, 2008

Free Template: 3 Columns The Red Template


I am quite happy that I have successfully created a new template to my Blogger's Template Series. I named the newly created template "The Red Template". The new template is not whole red but some parts of the template are red in color. I tried my best to choose the best red color and I am sure that the red color I have chosen will not hurt your eyes.

So, if you are interested to get "The Red Template", please proceed to the later part of this post. You can download it and install it to your blog.


The Red Template Specifications:

  • 3 Columns
  • 1 navigation bar
  • Dark Red, Pinkish Red, Grey and white
  • XML template
  • Free for All.

Download Gradient Blue Template Here...


**Please open the "Installing Navigation Bar" text file in the zip file to learn how to implement the navigation bar on Gradient Blue template.

If you encounter any problem installing or downloading the template, please do not hesitate to inform me. I hope that this new template will be a nice template for all.

Monday, December 15, 2008

How to Add Read More to Your Blog's Posts


Adding Read More to your Blogger's blog is not very hard to do. It only requires you to follow some simple steps and spend some time to copy and paste codes to your blog's template.

I found that adding "Read more..." function to our Blogger's blog posts is an effective way to make our blog looks more tidy and neat. Personally, I do not like a blog or site that have very long list of posts and I need to scroll down a lot of find the posts I want to read. So, by adding a "Read more..." function to our blog, we will shorten our blog posts and give a better reading experience for our blog readers.

So, please read on to learn how to implement "Read more..." function on your blog. I have make it short and simple for you to follow.


Please follow very carefully the steps describe below. You must do it step-by-step to make sure everything works properly. Do not skip the steps.

Step-by-step Guide to Implement "Read more..." on your blog:
1. Login to your Blogger.com account, then go to "Layout">>"Edit HTML".
2. Now, please select the "Expand Widget Template" before doing anything. Then, find for in HTML code.

3. Copy and Paste the code below after .=

4. Now, look for the in the HTML code. Copy and paste the code below after .

Read More...

5. Now, Save your template.

6. Go to "Setting">>"Formatting". Then, scroll down to the lowest part of the page and you will find the "Post Template".

Note: "Post Template" is the place where you can place codes or words so that it will always appear when you create new posts.


Copy and paste the code below into "Post Template".


After you pasted the codes, your "Post Template" will look like the picture below:

If you cannot see clearly, please click the picture to enlarge it.

7. Now, click on "Save Settings".

8. Now, you can go to "Posting" to create a new post. On the new post page, you will see the page below:


If you cannot see clearly, please click the picture to enlarge it.
***Remember: Type part of your post before the and then type the rest of your post between the and .

Then, click on "Publish" and all your new post will look like the picture below:


If you cannot see clearly, please click the picture to enlarge it.

Now, you will have "Read More..." function for all your blog's posts now.

I hope my step-by-step guide above will be helpful. You might want to read about "How eblog templates implement the Read More function". Enjoy the new feature.

Friday, December 12, 2008

My MyLot Earnings USD$14.73 November 2008 Received


Thanks again to MyLot. I have received my payment today. My earnings in MyLot for November 2008 is USD$14.73 and I got the payment today in my PayPal account. I am quite happy with it and I am going to make more this month. I will work very hard this month (December 2008) so that I can show you the biggest earning and payment proof from MyLot in January 2009.


If you always follow my blog, you will find that I already got several payments from MyLot and you might already know what MyLot is. For me, I think that MyLot is a site for me to chat and discuss about a lot of stuff and make money at the same time when I discuss and chat.

MyLot is a site for me to make extra income and work hard for the extra income. If you are still not sure what I MyLot, then you might want to read more about it using some of the links below.

If you are not sure what is MyLot, read more about it below:
Join MyLot to Make Extra Money!!!

Wednesday, December 10, 2008

Add Extra Columns in Your Blogger's Blog Header


You might see that some blogs or sites are having extra columns in their blogger blog's header. Some of those blogs or sites are using the extra columns of their blog's header to sell advertisements to make more extra income from their blog while some other bloggers are using the extra blog's header columns to place navigation bar for their blog or they will use the extra blog's header columns to place the "Subscribe to the Feed".

So, if you are looking for the way to ad extra columns to your blog's header, this post will be helpful to you. I have written down the steps to do to create columns in your blog's header.


The picture above shows the blogger blog's header after modified.

Note: Please note that not all blogger's template can be modified using the same method as describe below. I am sure that the methods below are suitable for minima templates. The steps mention below can be used for blogger's templates with the "header-wrapper" code.

Step-by-step Guide:
1. Login to your blogger account. Then, go to "Layout">>"Edit HTML". Now, Do Not Choose "Expand Widget Templates" and look for the code below:

#header-wrapper {
width:660px;
margin:0 auto 10px;
border:1px solid $bordercolor;
}

#header-inner {
background-position: center;
margin-$startSide: auto;
margin-$endSide: auto;
}

#header {
margin: 5px;
border: 1px solid $bordercolor;
text-align: center;
color:$pagetitlecolor;
}


2. Then, replace the codes above with the codes below:

#header-wrapper {
width: 660px;
border: 1px solid #000000;
margin:0 auto 10px;
border:1px solid $bordercolor;
clear: both;
word-wrap: break-word;
overflow: hidden;
}

#header-inner {
background-position: center;
margin-left: auto;
margin-right: auto;
}

#header {
width: 400px;
float: left;
margin: 5px;
border: 1px solid $bordercolor;
text-align: center;
color:$pagetitlecolor;
}

#header-right {
width: 220px;
float: right;
border: 1px solid $bordercolor;
color: $pagetitlecolor;
margin: 5px;
}

#header-right-top {
padding: 0 5px 10px;
}

#header-right-bottom-section {
padding: 0 5px 10px;
}

#header-right ul {
margin: 0;
padding: 5px;
}

#header-right ul li {
display: inline;
padding: 5px;
}

#header-right-bottom {
width: 220px;
float: right;
border: 1px solid $bordercolor;
color: $pagetitlecolor;
margin: 5px;
}

#header-right-bottom ul {
margin: 0;
padding: 5px;
}

#header-right-bottom ul li {
display: inline;
padding: 5px;
}

The codes above might not match the width of your blog's template. So, place make some modification to the width so that it matches your blog. The width that you might need to change is #header-right-bottom, #header-right, #header and #header-wrapper. Remember that #header-right-bottom and #header-right should be of the same width to prevent out-of-shape blog's header.

3. After pasting the codes above, now you need to find for the codes below:


4. Replace all the codes in step 3 with the codes below:


5. Now, you have completed all the important steps. So, you will need to click "SAVE TEMPLATE" to save the changes that you made.

Done. Now, you have successfully modified the your blogger blog's header. You might want to firstly "Preview" the changes before clicking the "SAVE TEMPLATE" button. After you save everything, your blog's design will look like the picture shown.

Enjoy.

Monday, December 8, 2008

Changing Your Blog's Favicon to Your Own Favicon


Do you know that you can change the favicon of your blog hosted on Blogger.com to the favicon of your own? Normally, we will have as our blog favicon. For me, I do not like the favicon because it makes my blog look not professional. So, I change it to my own favicon.

You can change your blog's favicon to your preferred favicon too. It is quite easy to make the modification. Just follow the steps described at the later part of this post, I am sure you can do it too.


Changing blog favicon is not as hard as it seems. It is quite simple and you only need to do some simple steps to change the favicon to your preferred favicon. So, please read the steps below:

Step-by-step Guide:
1. First of all, you need to have the image to be used as your favicon. If you do not have one, you can use favicon generator to create favicon using photos. You can use the Favicon Generator on BloggerBuster. If you do not know how to create your own favicon, you can get free favicon at Favicon Gallery or you can check Smashing Magazine for ideas of favicons.
2. Now, Login to your Blogger.com account.
3. Go to "Layout">>"Edit HTML".

4. Copy the code below:


*Remember: Change the URL "http://your-icon-url.png" to the URL of your favicon. For example, if you upload your favicon to Photobucket, then you will need to login to your Photobucket account to copy the URL of your favicon.

5. Now, find for the section within the HTML codes of your blog. Paste the code in step 3 after the .
6. Now, save your template.

Done. You have successfully change your blog's favicon to your favorite favicon. You can now try to visit your blog and you will notice that the favicon is changed to your preferred favicon.

Friday, December 5, 2008

How to Add a StatCounter to Your Blog

Knowing how many visitors and page views your blog has per day is important. I think that it is very important to check whether your blog is being viewed by other people or not. So, if your blog do not have a stat counter, you will never know how many people are reading your blog.

So, adding a stat counter to your blog can help you a lot. You can know where your readers comes from, how many people are viewing your blog, how many page views your blog get per day and so on. I am having a stat counter at the lower part of right sidebar. I am using ShinyStat and it is free.

If you want to add a stat counter to your blog, you might be interested to read the rest of this post. I will show you step-by-step to add a statcounter to your blog.

There are several stat counter service available online. Most of them are free service. I would not list all of them here because it would be a very long list. So, I only list down the 5 great and free stat counter services as below:
  1. ShinyStat
  2. StatCounter
  3. HiStats
  4. GoStats
  5. AmazingCounters

Personally, I like ShinyStat because it is a very good stat counter. It has a lot of features such as showing traffic chart of your blog, showing which countries your readers come from, what sites are linking your blog, what operating system your readers are using and so on.

Before you can add a statcounter to your blog, you will need to sign up for the statcounter services I mentioned above or if you do not like the services I recommend, you can try to find for other options using Google Search.

After you have signed up for the service, you need to follow all the steps of the service to setup your statcounter. Then, the most important part is to get the HTML code of the statcounter you have setup in the service.

Step-by-Step Guides to Place Statcounter on Your Blog:
1. Login to you Blogger.com account.


2. Go to "Layout">>"Add a Gadget">>"HTML/JavaScript".
3. Then, paste all the HTML code of your statcounter in "HTML/JavaScript".
4. Save.

After saving, you might want to move the "Gadget" on the layout around. Then, save it when you have place the "Gadget" at your preferred place.

Now, the statcounter will start recording down the traffic on your site. You will be able to know how many people are viewing your blog and so on.

You might want to read about "Adding ChatBox to Your Blog" to mae your blog more interactive.

Wednesday, December 3, 2008

Adding a Comment Form to Your Blog Posts

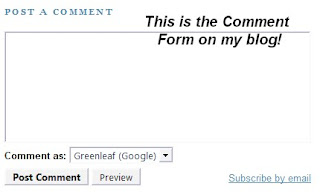
Do you noticed that all my blog posts are having a Comment Form like the picture on the left? Normally, if we want to write comments on blogs created in Blogger.com, we will click on the "Comments" or "Post a Comments" link after the blog post and a popup window will appear for us to type in our comments. I feel that the popup comments window is quite annoying and I do not like it. So, I login to my Blogger.com account and make some tweak to the comment feature of my blog. By doing some simple tweaks, I can place an "Inline Comments Form" or "Embedded Comments Form" beneath all my blog posts.

After adding the comments form beneath all my blog posts, I found that it is much easier for my blog readers to write comments. Adding the comments form beneath my blog posts make my blog more user-friendly and looks more professional too.

I have written down some steps you need to do to make the comments form appear after every posts of your blog in the later section of this post.

The steps below are required to embed comments form after your blog posts:
1. Login to yhour Blogger.com account.

Go to "Setting">>"Comments".

2. Now, you are at the comments setting of your blog. You can see a lot of options for you to tweak such as the "Comments: Show/Hide", "Backlinks: Show/Hide", "Comments Timestamp Format" and so on.

In the comments setting, we are going to changed the "Comment Form Placement" setting.

3. I am sure you will be able to find "Comment Form Placement" on the page, then select "Embedded below post". By choosing this option, you are making the comments form to appear below your blog posts after people click on "Comments" or Post a Comment" link of your posts.

4. This step is optional, you can skip this step if you do not want to change anything f "Who Can Comment?". After you choose the setting, you can proceed to change the setting of "Who Can Comment?". Here, you can choose who can write comments on your blog posts. If you allow anyone to write comments, then you can choose "Anyone". There are 3 more options left which are "Registered User (include OpenID), "Users with Google Accounts" and "Only members of this blog". So, it is up to you which option you prefer.

5. Now, "Save Settings".

Everything is done. You can now visit your blog and then click "Comments" or "Post a Comment" link after your blog posts. You will be directed to a page where you will see the Comments Form below you post. There you can write your comments.

I hope you will enjoy using this simple tweak.

Add a ChatBox to Your Blog

Adding a chatbox to blog is a great way to interact with your blog reader. You can see that I am using a chatbox on my blog at the right sidebar. I am adding the chatbox to increase interaction with my blog readers.

You can add a chatbox to your blog too. It is quite simple and it is a great way to add more activity on your blog. In this post, I will share some sites that gives us free service to place a chatbox on our blog.

I manage to find 3 sites that are giving free chatbox service for bloggers. You can read about the features of chatbox below:

1. Cbox:

Cbox is the chatbox that I am using on my blog now. It is a free chatbox service. I like thisservice because it has some nice designs to choose from. If you want to use Cbox on your blog, you can choose the colors according to the color of your blog. It is a neat chatbox too. The bad thing about Cbox is that it does not have spam protection.

2. Shoutbox:

ShoutBox is a very popular free chatbox service. It is a great chatbox service. It has spam protection and the colors can be changed too. On the chatbox, it will shows the number of users are currently on your blog. I think that it is a good chatbox service. I might want to change my chatbox to this service soon.

3. Flooble chatter box:

Flooble chatter box is another free chatbox service. Personally, I do not like the design of the chatbox and it is not very user-friendly. So, I do not use it.

There are a lot of other chatbox services available. The 3 services I mentioned above are the more popular services. You might want to try other services if you do not like the 3 chatbox services I mentioned above.

Tuesday, December 2, 2008

Prevent Plagiarism, Disabling Text Selection on Your Blog


I found that a lot of bloggers are facing plagiarism problem. Some people like to copy the posts on blogs and paste it on their blog to use it as their own contents. Actually, if those "copy and paste" people would like to share, they can spend sometime reading the posts on other blogs and write a new post using their understanding about the topic but they are too lazy to read, too lazy to understand and too lazy to type.

So, this post is about how we can avoid "copy and paste" people from copying our blog contents. I found a script that can disable "text selection" on our blog on Dynamic Drive. So, by using the script, text selection on our blog will be disabled and so "copy and paste" cannot be done.

Prevent text selection on your blog is quite simple.

Step By Step Guide:
1. Login to your Blogger.com Account then go to "Layout">>"Edit HTML".
2. Then, all you need to do is to copy all the code below:


The code above is obtained from Dynamic Drive

3. Then, paste the code after the section of our blog.
4. Save your template.

Now, you can visit your blog and then try to select text on your blog. I am sure that it is no longer enabled. So, people cannot copy your post anymore.

Monday, December 1, 2008

6 Sites that Pays You to Write Reviews

Writing articles is a task that most people do online. People are writing articles for their blog, writing articles as freelance writers, writing short posts in forums, writing a lot of other stuff online. By far, writing articles online is the straight forward ways to express ourselves and of course, most people are making money from their articles online.

In this post, I will share with you the 6 Sites that are Paying Us to Write Reviews online. As a consumer, we always have a lot of experience to share about certain products that we use. So, why not share our experience with others and make some money by writing reviews for those products we use everyday.

The list below is the best of the best sites that people are making money from the reviews they write. I hope that the sites below will be a great help for you to make extra money online.

1. Ciao


Ciao is a great site to write reviews. The site is now in beta version. The payment is made via PayPal and it normally pays $0.25 per review. The payment is quite good per review. So, it is a good site to join to make some extra money.

2. Review Stream

ReviewStream allows writers to write almost about anything they like. Writers can write reviews of digital cameras, cars, cell phones, movies, food, music, computers and so on. The payment per reviews is $2.00 per review but it is not easy to earn that amount of payment for every review you write. So, there is another way to get paid for review which is bulk rate. The bulk rate is $0.40 per review. So, if your review is not accpeted for $2.00 per review, you will get the bulk rate of $0.40 per review.

3. Shared Reviews

SharedReviews pays you for your reviews. This another great site to make money from reviews. I visited the site and some writers on the site is making around $979.85 from their reviews. So, why not give it a try?

4. Shvoong

Shvoong pays 10% of its advetising revenues to writers. So, there is no exact payment per review. Writers will received their payment when they reach the minimum payout of $10.00. The payment is made through PayPal.

5. Epinions

Epinions allows users to write reviews and make money. In Epinions, the money you earned will be shown in your Eroyalties account. I think that it is a good place to make money. Make sure your reviews are following their rules.

6. Review Centre

Review Centre is a simple site to write reviews and make some money. the reviews on this site is created by users.

Saturday, November 29, 2008

Free Template: 3 Columns Gradient Blue

Today, I re-edited my Gradient Blue Template. I found that the previous version of Gradient Blue Template are having a lot of bugs and problems. So, this version is an upgraded version of the previous Gradient Blue template. If you would like to know more about this template, please read on.


Gradient Blue Specifications:

  • 3 Columns
  • 1 navigation bar
  • Black, Blue and Grey
  • XML template
  • Free for All.
Download Gradient Blue Template Here...

**Please open the "Installing Navigation Bar" text file in the zip file to learn how to implement the navigation bar on Gradient Blue template.

I have decided to create a series of templates for free and you can download it for free from this blog. All the templates will be placed under the new section called "Blogger's Templates Series". I hope you will like it.

Thursday, November 27, 2008

Setting up Your AdSense for Feeds

AdSense has added a new feature in our AdSense Account. The new feature is called AdSense for Feeds. So, as an AdSense Publisher, we can add AdSense Ads in our Feeds to make even more money.

I am now monetizing my feed of my other blogs and I am seeing some improvement in my AdSense earnings. I think that it is a great new feature from Google AdSense.


How to Implement AdSense for Feeds in our Blog Feed:
Implementing AdSense for Feed is quite simple, it only consists of a few steps.

1. Login to your AdSense Account.
2. Go to "AdSense Setup".


3. Choose "AdSense for Feeds"
4. Then, scroll down to the lowest part of the page where you will see a link "Move FeedBurner feeds to your Google Account", click the link.
5. You will be redirected to FeedBurner and you are required to login to your FeedBurner Account.


6. Then, you will reach a page with a list of your feeds in FeedBurner. The lower part of that page has a button called "Move". Click on it.
7. After that, you will come to a page showing that you have successfully move the feeds to Google AdSense.
8. Click on a button "Return to Google AdSense".


9. Now, all your feeds are in your Google AdSense Account. You can choose the feeds you want to show AdSense Ads by clicking the "Add" link.


10. You can make changes to the AdSense Ads design by clicking the "Let me choose my colors".
11. After everything is done, click the "Save" button.

Everything is properly setup. After 10 minutes, your feeds will have AdSense Ads. So, if your readers click on it, you can make money from it.

Wednesday, November 26, 2008

Project Wonderful: Sell Ads Space on Your Blog

I come across Project Wonderful today. It is a site that give all website or blog Publishers a way to sell ads space on their site or blog. I learn that a lot of people are successfully making money from Project Wonderful. For me, I am not sure about it. So, I do not join Project wonderful. After thinking about Project Wonderful for a few days, I decided to join it and try it out. It is free to join, so why not.

For the time being, I am still waiting for their approval for my blog. I hope to get approval soon and show you some of the features of the site. You can continue reading to read more about Project Wonderful.

By using Project Wonderful, you can manage ads space on your site easily. then, you can sell space on your blog to make money. The Project Wonderful site gives you the codes and the you can track it within your Project Wonderful account.

So, if you like to sell space on your site, then you can try Project Wonderful.

Monday, November 24, 2008

Earn Money From Blog Updated with New Look!!!


To all my readers,
Earn Money From Blog is now in new look. I have created a new template for Earn Money From Blog. This is the 1st step to make Earn Money From Blog a better blog for all.

I hope the new design will be a great new look for all. More modifications are coming. Stay tuned!!!

Regards,
Greenleaf
(Admin of Earn Money From Blog)

Thursday, November 20, 2008

Earn Money From Blog is Going to Have Major Changes Coming...

Fellow readers, I would like to inform all that Earn Money From Blog will be having a changes soon. I am on my way to complete my new design for Earn Money From Blog and soon Earn Money From Blog will have a new look.

There will be more changes to Earn Money From Blog. I hope to create a better blog and give all readers a better place to learn and make money.

Stay tuned and enjoy. :)

Saturday, November 15, 2008

My Oct 2008 MyLot Payment: USD$15.62


The picture above is the payment proof of MyLot for October 2008. I have received another payment from myLot. This is the 6th payment from MyLot. MyLot is the greatest site ever. Thanks to MyLot Admin for the on-time payment every month.

If you are not sure what is MyLot, read more about it below:
Join MyLot to Make Extra Money!!!

Monday, November 10, 2008

Bidvertiser Free USD$20.00 for Everyone

I received an email from Bidvertiser today. Bidvertiser is having a promotion to attract more advertisers to the site. It is offering USD$20.00 as advertising credits for every new advertiser sign up. It is Free money for everyone, so I grab it as fast as possible.

So, I decided to give it a try. I login to my Bidvertiser Account and then I go to the "Advertiser Center" section. Yeap, there is a button to sign up as new advertiser and get USD$20.00 Free.

I click on the button and follow all the steps. The steps are step-by-step guides to create a new Ads of my own. You can have a look at the Ads I created below:


After I have created the Ads, I get $20.00 as the Advertising credit in my Bidvertiser Account. I decided to make good use of the Advertising credits. I am going to use it soon when the NEW Earn Money From Blog is ready.

Overall, I think that Bidvertiser is the best alternative to Google AdSense. I am going to implement Bidvertiser Ads on Earn Money From Blog soon. Now, I am busy creating and finding a new design for Earn Money From Blog. Stay tuned for the NEW Earn Money From Blog.

Place your ad on thousands of sites with BidVertiser. Get $20 in FREE clicks.

Thursday, October 16, 2008

Yeah! My Payment of £18.00 GBP from Matched.co.uk!


Yeah, I get my payment of £18.00 GBP from Matched.co.uk. It is really great because I am placing the advertisements of Matched.co.uk on my other blog and I get paid every month for placing the ads on my blog. A big thanks to Matched.co.uk admin.

Unfortunately, few weeks ago, Matched.co.uk is now closed. So, it is no longer available. Personally, I think that the site is truly a great site and it has a good admin. Since it is cloed down, we can't do anything. So, let's look for other options to make money online.


Announcement: Match.co.uk Is Closed!

Saturday, October 11, 2008

Another Payment from MyLot: USD$10.47


The payment proof above is my earning in myLot for previous month. So far, I have received 4 payments from myLot and I am really happy using myLot to make money. You can see more payment proof here and here.

If you are not sure what is MyLot, read more about it below:


If you like to join and chat in forum, then MyLot is a great paid forum to join.


Monday, October 6, 2008

LinkShowOff: Sell Links on Your Blog to Make Monthly Passive Income

A site called LinkShowOff is helping bloggers to make money by providing bloggers a service to create widget to sell links on blogs. Now, we can sell private advertisements on our blog too.

Bloggers are allowed to set the desired amount of payment per link. The default price per link is USD$1.00 per link. I am selling links on my blog at the default price (USD$1.00). You can sell up to 20 links in your widget.

The widget to sell links on your blog looks like the picture below:


I think that LinkShowOff is a new idea to help bloggers to make money from blog. You can have a look at the site to get more information and make more money from your blog. So far, I have not make any money from LinkShowOff. I think that it would not an easy way to make money from it.

Try it today:
Linkshowoff

=======================================================================
If you are very hardworking, passionate and determine, joining myLot is a sure fire way for you to make a lot of money. Make sure you are hardworking, if you are not hardworking, then money will not come to you.